Here are instructions on how you can create a Google form, embed it on your site, or share it with others.
- First, make sure that you are creating a Google form through your Wesleyan account–all information in your Wesleyan Google account is inaccessible by Google.
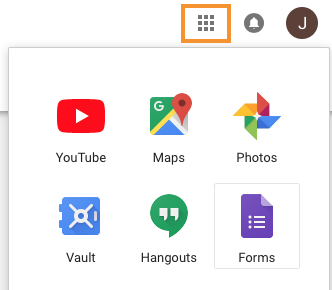
- From your Google Drive, click on the Google Apps menu (located near your account icon). Click More and then click on the purple icon labeled “Forms“.
- Once you select form, Google will take you to the Google Forms page. The first thing that appears are options to start a new form by choosing a theme for your form. Choose a black form or an existing template to get you started. (More template options are available in the Template Gallery section). You may also change the design of the template later on.

- There are now various things you can do to set up your form.
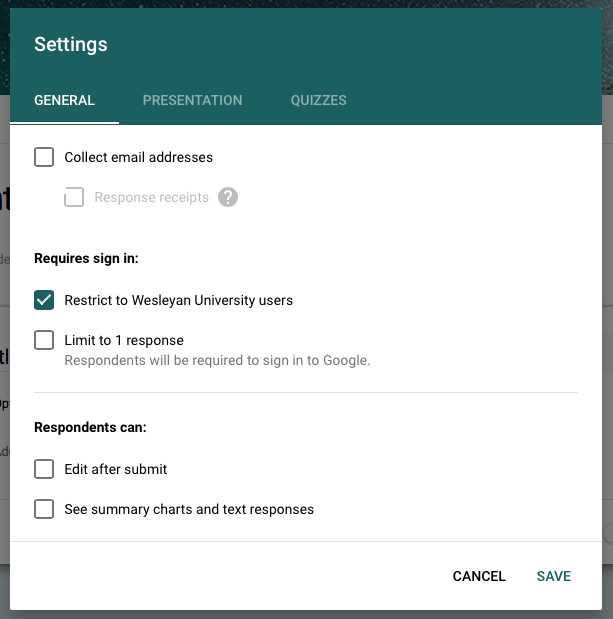
- First, the Form Settings section at the top of the page (gear icon
 ) gives you the option to:
– Require Wesleyan University login to view this form
– Automatically collect respondent’s Wesleyan University emails
– Limit responses/ Submit multiple responses
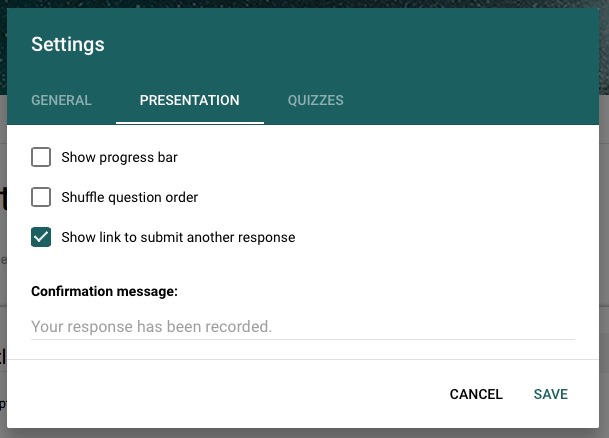
– Show progress bar at the bottom of form pages
– Change “Confirmation Message” text
Check the boxes of the options you want.
The top toolbar also allows options of previewing the form (eye icon), and customizing the color palate and adding banner images (artist palate icon)

Customizing Form
- Now you can customize your form. See below for the various customization options for your form.
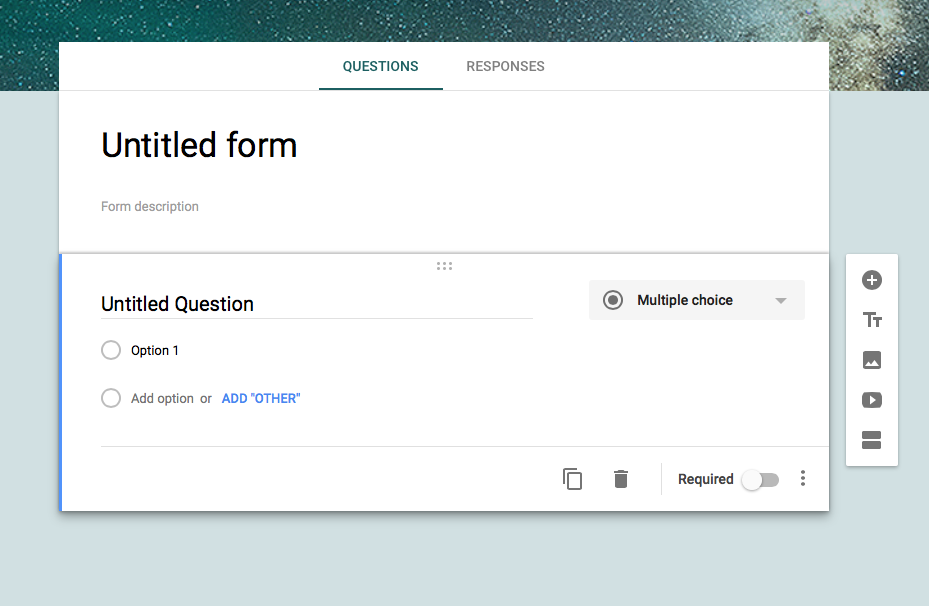
- Where it says “Untitled form”, you should name this form–this name here is what will appear at the top of your form when you share or embed this form.
- You can give this form a “Form Description” to explain or give more information to this form.
- You may now add questions or other sections. There are variety of question types or items that you can add to your form.
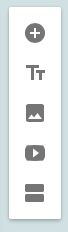
- The side toolbar appears next to the area you are currently editing.
- The Plus Sign at the very top adds another question to the form
- The Tt adds a new Title and Description area
- The Picture Icon adds an image area where you can upload an image to the form
- The YouTube Icon allows you to add a YouTube video either by searching the video name in the YouTube box (as you would on YouTube) or pasting in the URL of the video.
- The two block lines at the bottom of the toolbar adds a new section to the form
(Note: Selecting one of these options from the toolbar will add it immediately under the area you are in. You can drag and drop the different areas if you decide to change the order of items in the form)
You can change the style of each answer in the form. The default option is set to multiple choice. Click on the Multiple choice box to get a dropdown list of options.
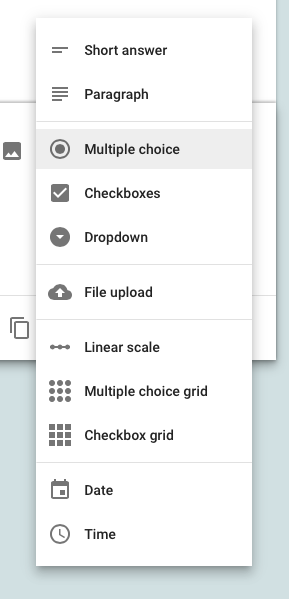
- Short Answer is an item in which you can ask a question and expect a short response.
- Paragraph allows the respondent to have a more lengthy response.
- Multiple choice allows you to set up different answer selections and to select with a circular button.
- Checkboxes are the same as Multiple choice, aside from the fact that it appears not as a circle but a check mark.
- Dropdown also allows you to set up various answer selections but the respondent would select one answer from a drop down list of options.
- File Upload allows respondents to upload files from their computer or their Google Drive. You can set parameters about what types of files can be uploaded, how many, and set a max file size.
- Linear scale allows you to set up a scale response, in which you would set up the range (by default, it is from 1 to 5), and you can define the range (e.g., 1 as “angry” and 5 as “happy”) and respondents will select within that range.
- Multiple choice grid allows you to define variables in a table format with various answer possibilities.
- Checkbox grid allows you to define variables in a table format just like the Multiple choice grid except the respondent can choose multiple options within the same row (example: check all that apply).
- Date and Time allow you to ask respondents regarding date and time.
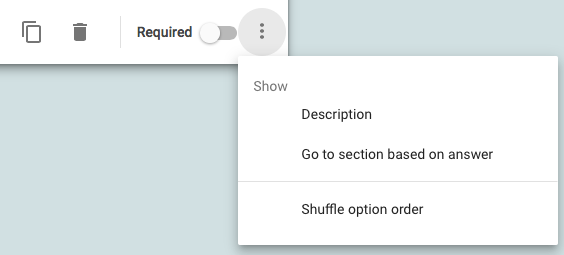
At the bottom right corner of the question area you are editing – a few more options are available such as:
- Duplicating an exact copy of that question area
- Deleting that question
- Making the question “Required” for respondents to complete
- Show a description for that question
- Other “Show” options vary based on the type of answer being given– some may only have “Show Description” etc.
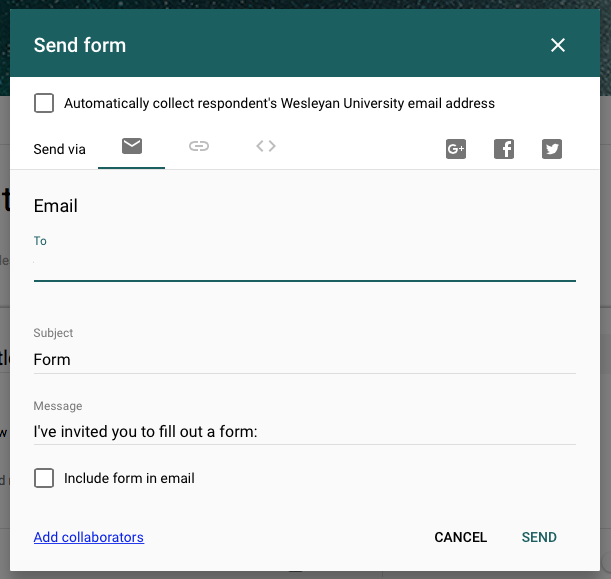
- The Send button at the top of the page will allow you to share this form via a email, link, or social media plarforms. You can also select “Embed” to find the code you will need to paste into your website’s page in HTML to have it appear on your site.
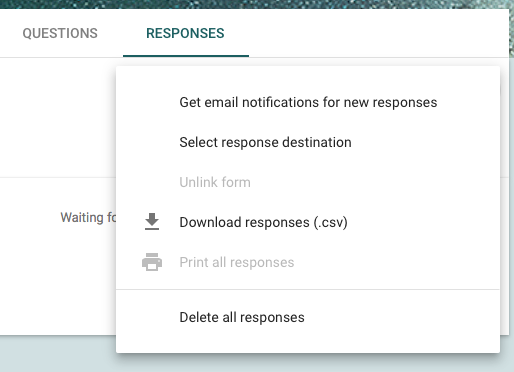
- You will now want to also make sure that in the Responses tab (located at the top of form), the setting is set to “Accepting responses”. Here you can also view the responses already submitted. To stop accepting responses to the form – click on the “Accepting Responses” button and it will switch to red and say “Not accepting responses”.
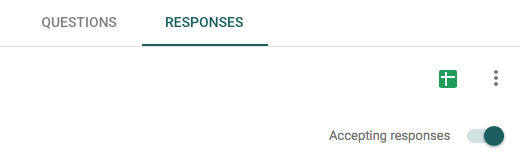
- Clicking the three vertical dots opens up more options where you can get email notifications for new responses, download responses, and select a response destination which will put responses into a selected spreadsheet that you can then access through your Google Sheets.