In order to create a new section with pages underneath it on your website, you will have to:
- create a folder
- Within the folder you need:
- to have at least two pages
- one needs to be named “index”
Create a New Section (Nested Navigation) Video Documentation
Step 1
In Cascade create a new folder.
- High light the folder where you want this new folder to reside.
- If this folder is being used for navigation the new sections must live under the “Base Folder”
- If this is the case, select your Base Folder
- hover over Base folder to highlight it
- click on the right facing arrow to the right of the folder name
Step 2
Select the Add Content tab at the top of the page
- then select “Folder”.
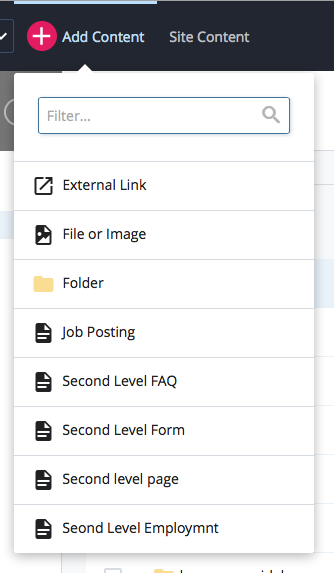
- A window will pop up.
Step 3
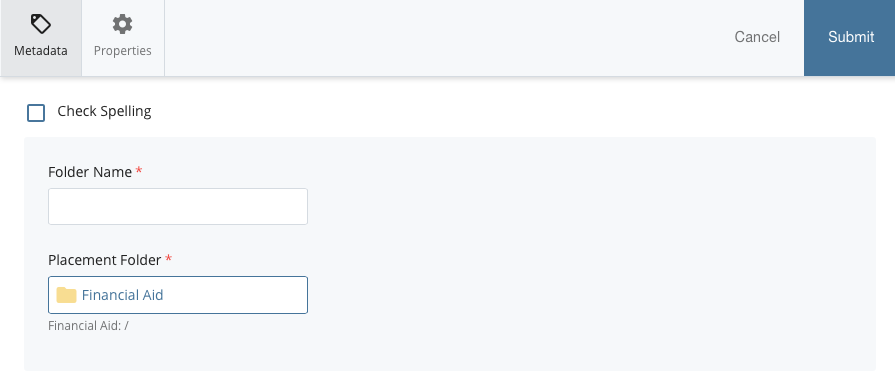
In the field called “Folder Name,” give this folder a system name.
- Remember, a system name should be
- all lowercase characters
- no spaces
- no special characters or symbols
- For example, a system name may be: “systemname“, but not “System Name”.
Directly underneath the Folder Name section will be a Metadata section.
Step 4
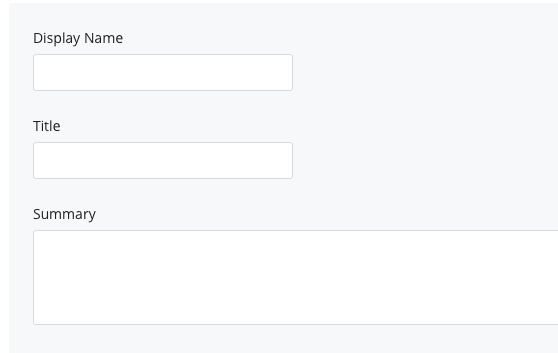
Give your folder a “Display Name”.
- A display name is what appears in your site’s navigation.
- A display name can be formatted any way you’d want the user to see it, such as: “New Folder”.
Step 5
Once your folder has both a display name and a folder name, you can hit Submit at the top of the window.
- Your folder is created — you should see it in your file listing
Next, you need to create pages to live within that folder.
Step 6
High light the folder in the left-hand navigation.
- hover over your folder to highlight it
- click on the right facing arrow to the right of the folder name
Step 7
Click “Add Content”and select “Second Level Page”.
- This page that you create must have a Page Name of “index”. (Remember! Page names are always all lowercase with not spaces!)
- Ensure that this page has also a Display Name (within the Metadata) and a Title so the page appears properly in your navigation.
Step 8
Once this “index” page is created in this new folder, go ahead and create another new page, this time giving it a page name of whatever you’re creating these pages for.
- Now that you have a folder that is properly named and two pages within that folder, one of which is “index”, you’re ready to go!