(Note: This tutorial was made using Adobe Photoshop CS6, but earlier/later versions of Photoshop should have only cosmetic differences; the mechanics of image resizing and cropping should be the same.)
Cropping Images
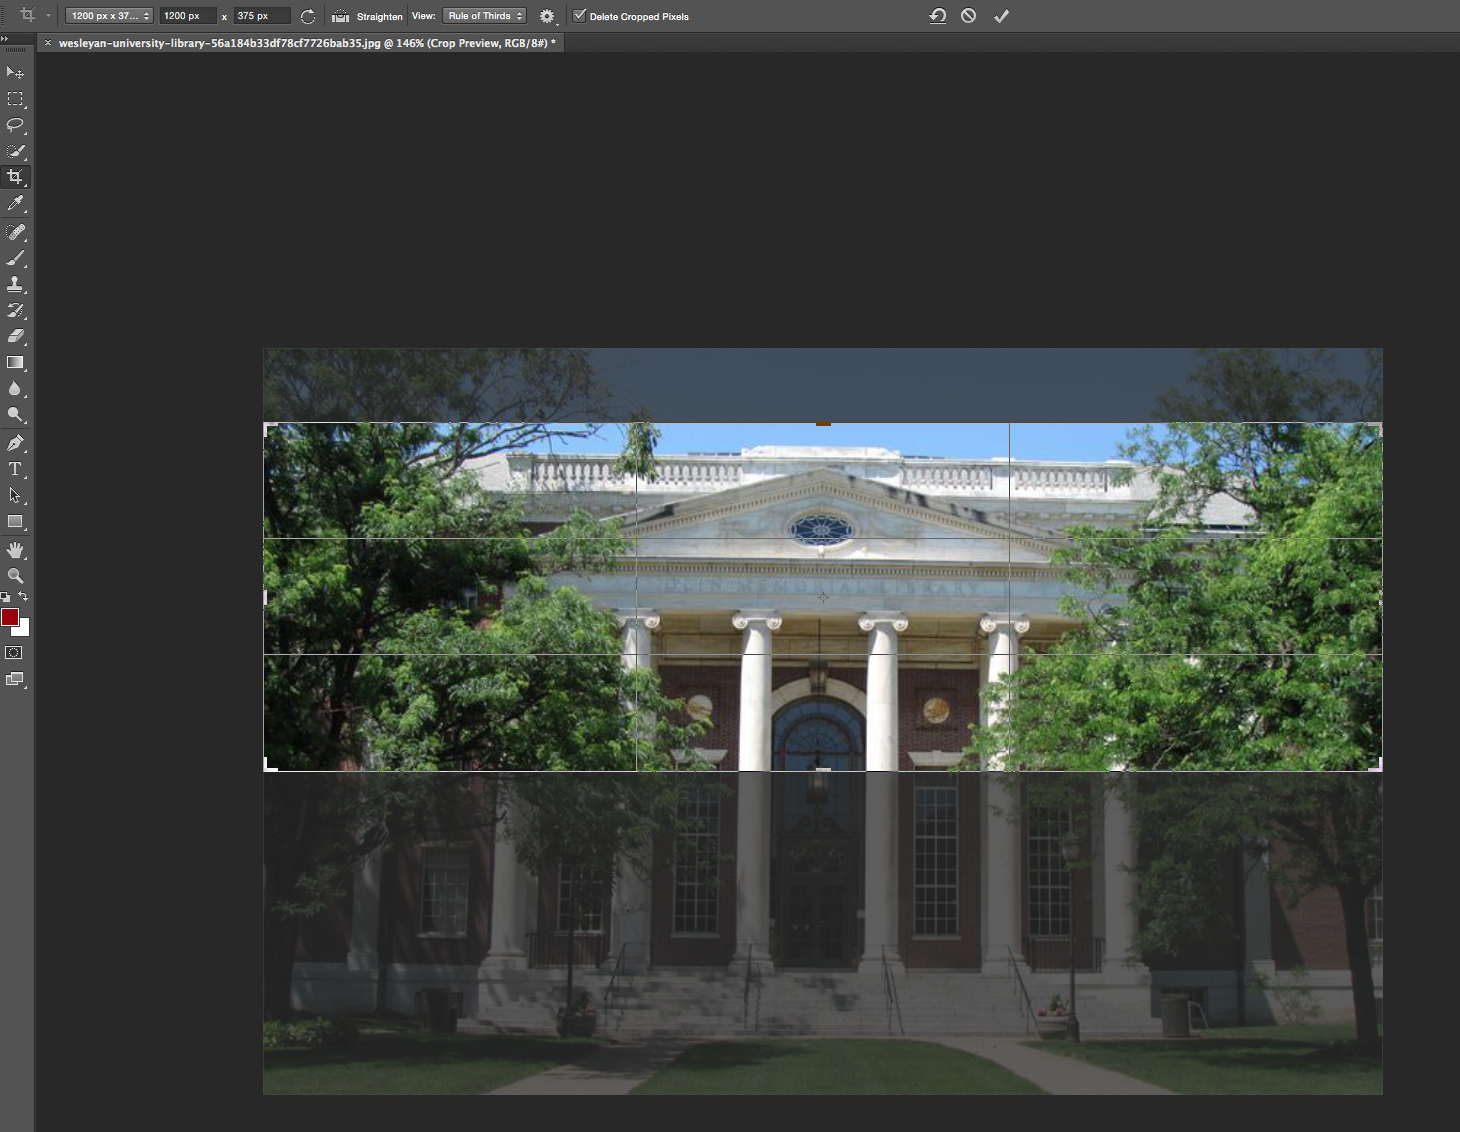
1. Open the image in Photoshop.
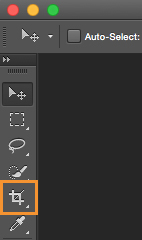
2. Select the “Crop” tool from the lefthand toolbar.
3. Lock the dimensions of the cropped area by changing the width and height of the tool in the upper toolbar.
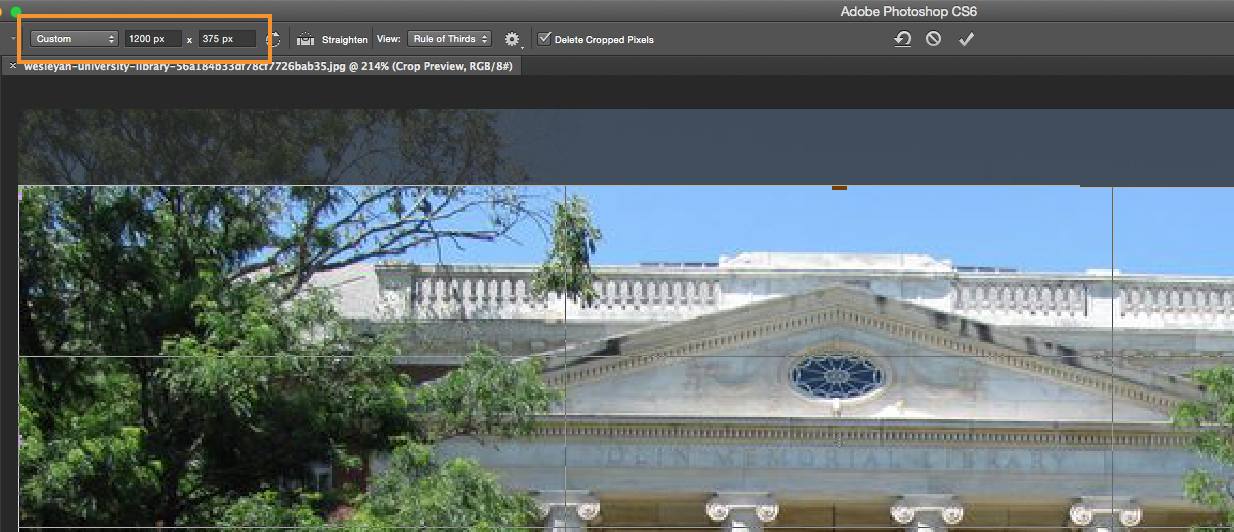
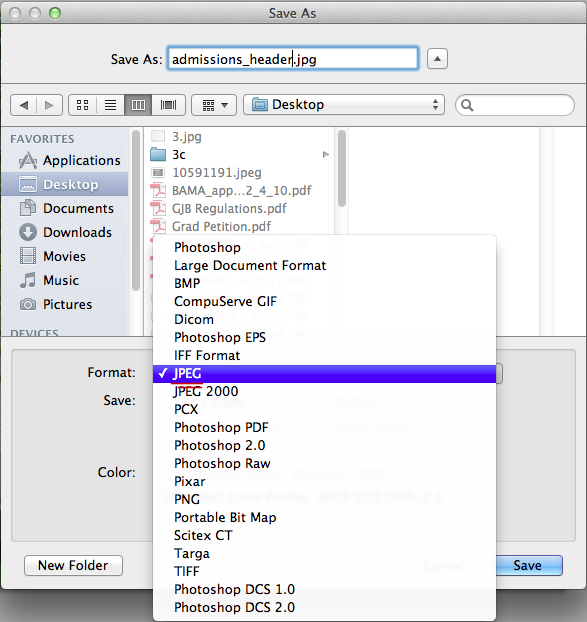
- Click on the button labeled “Custom” >> Select “Size & Resolution” from dropdown menu and make sure the “Resolution” field is set at 72 pixels/inch. See below for which dimensions to set.

The size will depend on where the image will be located.
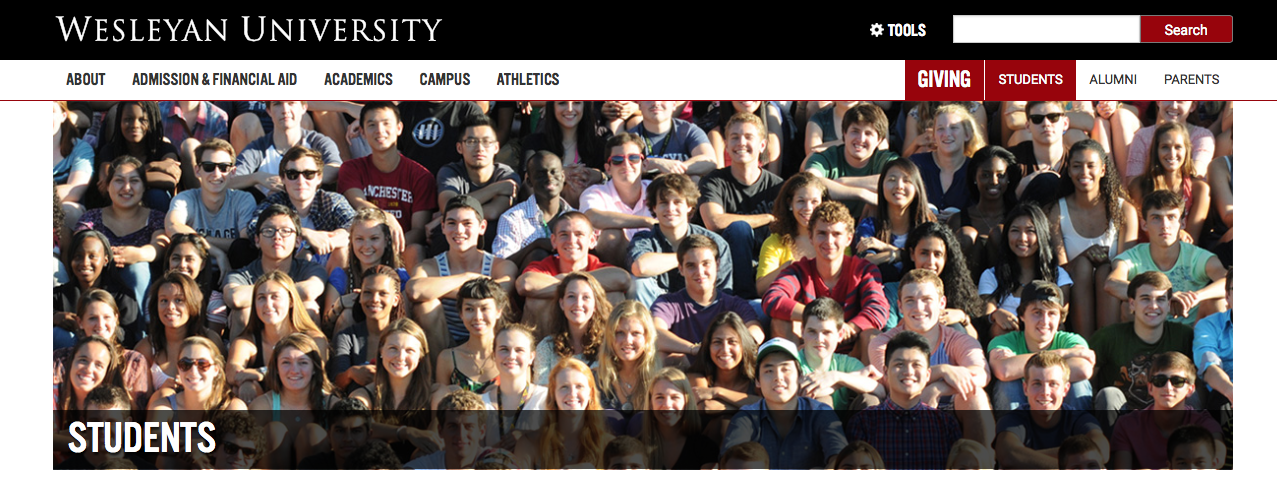
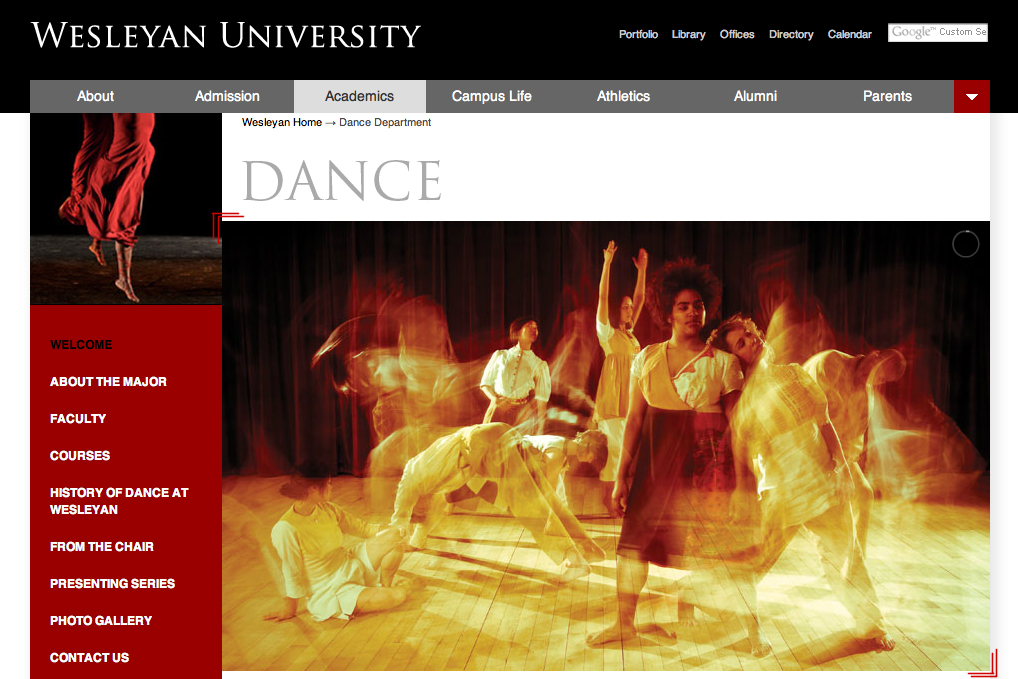
- 3a. If it will be a single-photo banner as seen below, the crop tool should be specced to 1200 x 375 px (1200 pixels wide and 375 pixels high).
- You will also need to make a small sized banner of the same image specced at 600 x 189 px (600 pixels wide and 189 pixels high).
- 3c. If it will appear in a gallery as seen below, the crop tool should be specced to 500 x 350 px.
4. With the dimensions set, click and drag over the original image to select the area of the new image. The frame will snap to the dimensions you have specified; you can also click and drag the corners of the crop square to adjust the image. Photoshop will gray out the areas to be cropped out to give you a preview of what the new image will look like.
5. Press Enter to finalize the crop.