The News Items are the 3 news items that are displayed on the homepage in the News section.
For every news item you will need:
- an image for each news item
- descriptive text
- link to larger story
Uploading the Images into Cascade
- create the image
- 640 x 360
- upload the image(s) to cascade
- use the dropdown to navigate to Home
- high light the images > news-items folder
(make sure you click the small arrow in order to highlight folder) 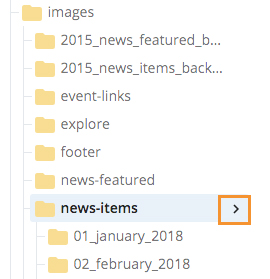
- for each image
- go to Add Content > File or Image
- Browse to find the image on your computer
- be sure to rename each image using a good naming convention in the File Name field.
- consider using the date in the name
- for example: 20141204-longlane.jpg
- Preview Draft
 to save draft and then Submit
  to upload the image to system
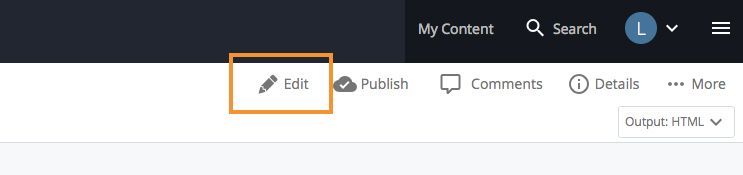
Once the images are uploaded you will need to add your new item to the component.
- use the dropdown to navigate to Home
- go to components > news
- press Edit
- you will see the data definition allowing for data input for news-item
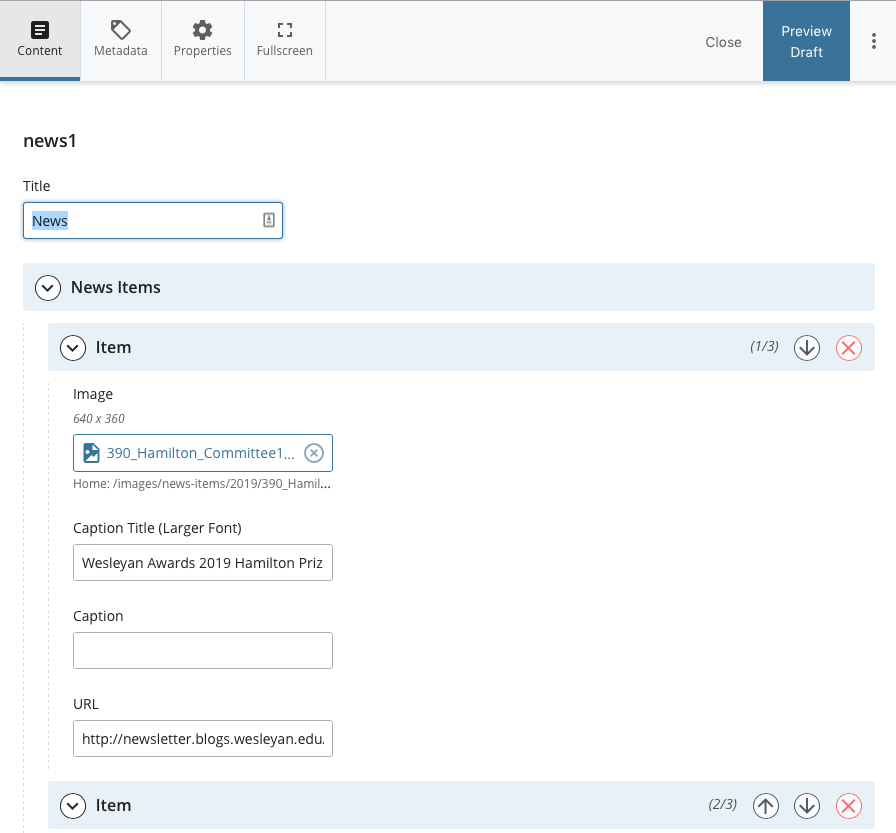
- click the box below Image to select the image.
- enter the Caption Title
- this is the bold text that sits below the image
- can be no more that 75 character
- do not enter Caption
- enter the URL
- this is where the caption text links to
- type in an External Link
- be sure to include http://
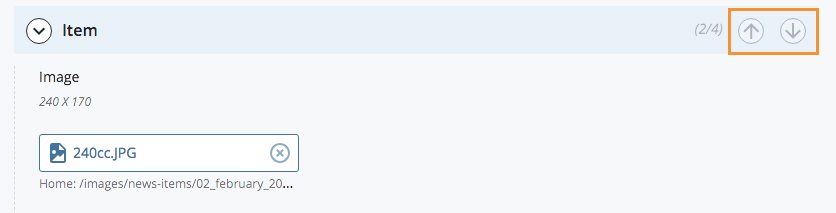
- Reordering the News Items
- use the up/down arrows to move the News Item up or down
- Preview Draft to save draft and then Submit to upload the image to system
Preview your changes in Cascade
-
-
- you can do a preliminary check of changes within cascade
- after submitting the draft you should be able to view the changes and how the page looks
- resize the cascade window to simulate the desktop, tablet and mobile views
- to allow others to see the image you can publish the homepage and the images to the Staging Server
- publish the images
- go to images > news-items
- select each image (if you have multiples do them separately)
- go to Publish
- be sure to uncheck the Production destination
- you only want to publish to the Staging destination
- publish the index
- go to the Base Folder
- select the index
- go to Publish
- be sure to uncheck the Production destination
- you only want to publish to the Staging destination
- after the images and index have been published to the Staging Server you can view your changes at
http://cascadewww-staging.wesleyan.edu - you can check this url on a desktop by re-sizing the window to simulate other device sizes
-or-
you can use this url on a tablet and/or mobile device
- publish the images
- if the text and/or image don’t work well at different sizes you may need to upload a new image or change the text
- when satisfied you can Publish the index to both destinations (Production and Staging)
- you can do a preliminary check of changes within cascade
-