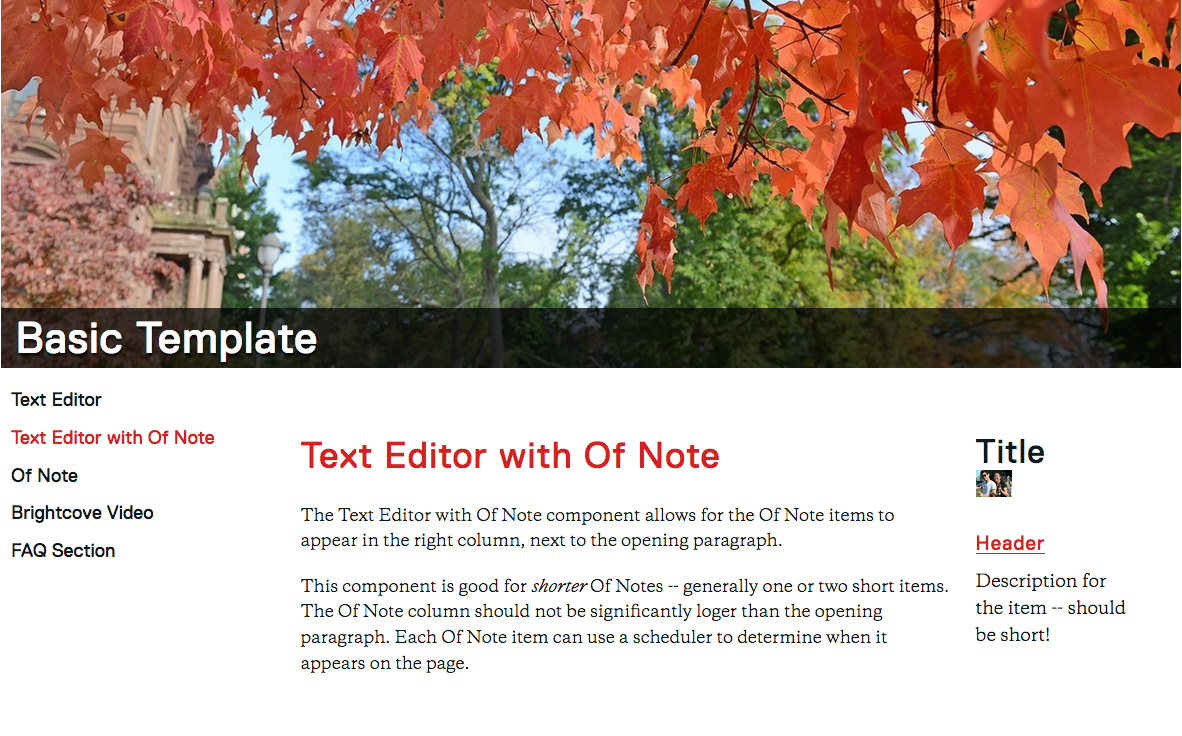
The Text Editor with Of Note component allows for the Of Note (announcement) items to appear in the right column, next to the page title and the opening paragraph.
This component is good for shorter Of Note items — generally one or two short items. Each Of Note item can use a scheduler to determine when it appears on the page.
The Of Note section can also be used to draw attention to content on a webpage — for example: calls to action or a departmental address. If there is no content in the Of Note section it will disappear and the main paragraph will span the width of the page.
note: The Of Note column should not be longer than the opening paragraph.
For many pages you will add another component below the Text Editor with Of Note — the Text Editor with Of Note component will introduce the other content on the page.
Example Text Editor with Of Note Pages
- using 1 row
- first row: Text Editor with Of Note
- contains Page Title and opening description in main column
- contains of note item (title, image, header, description, url) in right column
- first row: Text Editor with Of Note
- using 1 row
- first row: Text Editor with Of Note
- contains Page Title and opening description in main column
- contains of note item (contact info and red button) in right column

- first row: Text Editor with Of Note
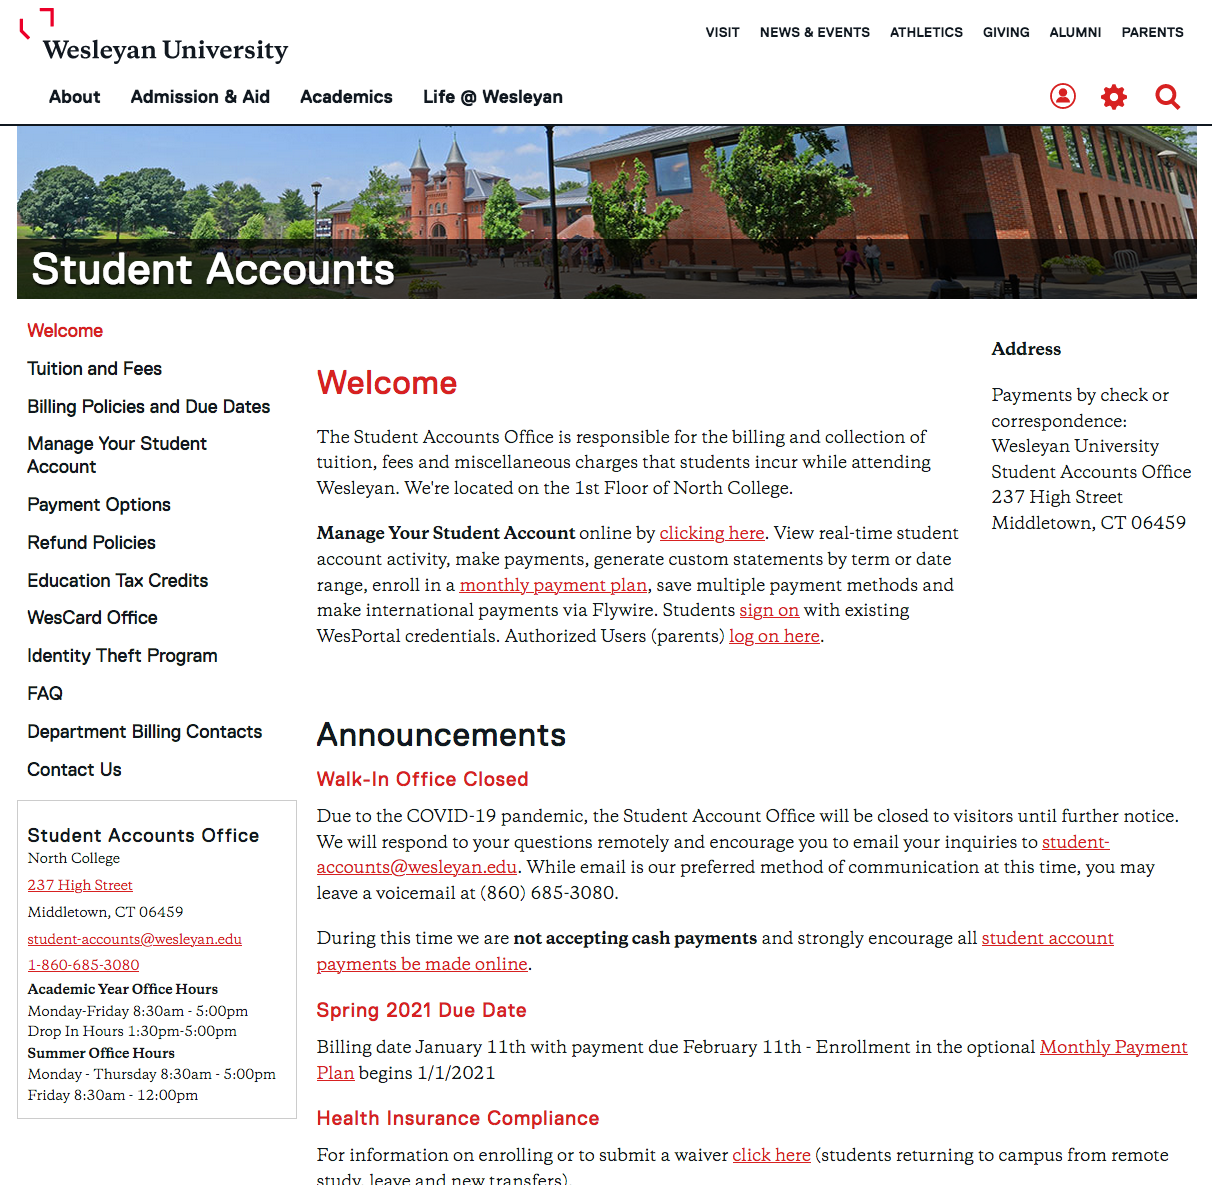
- using 2 rows
- first row: Text Editor with Of Note
- contains Page Title and opening description in main column
- contains of note item (contact info and red button) in right column
- second row: Block Grid

- first row: Text Editor with Of Note
- using 2 rows
- first row: Text Editor with Of Note
- contains Page Title and opening description in main column
- contains of note item (departmental address) in right column
- second row: Of Note (includes longer announcements in center of page)
- first row: Text Editor with Of Note
Editing Text Editor with Of Note Page
Test Editor with Of Note Video Documentation
- Click “Add Content” from the left side of the top bar in Cascade.
- A dropdown will appear, allowing you to choose what type of content you want to add to your website
- Select New Page
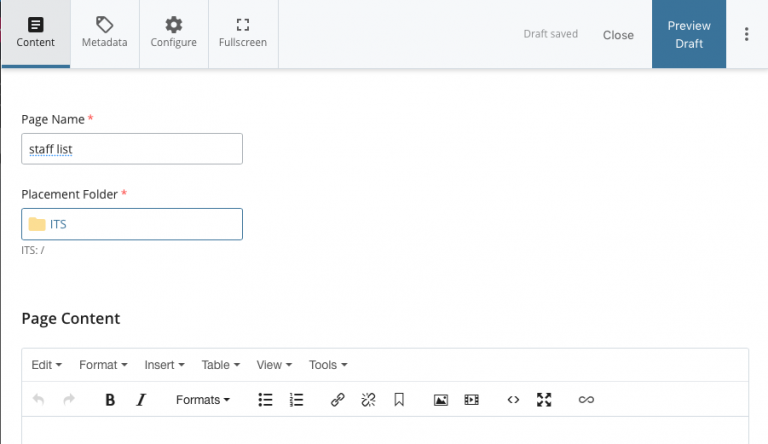
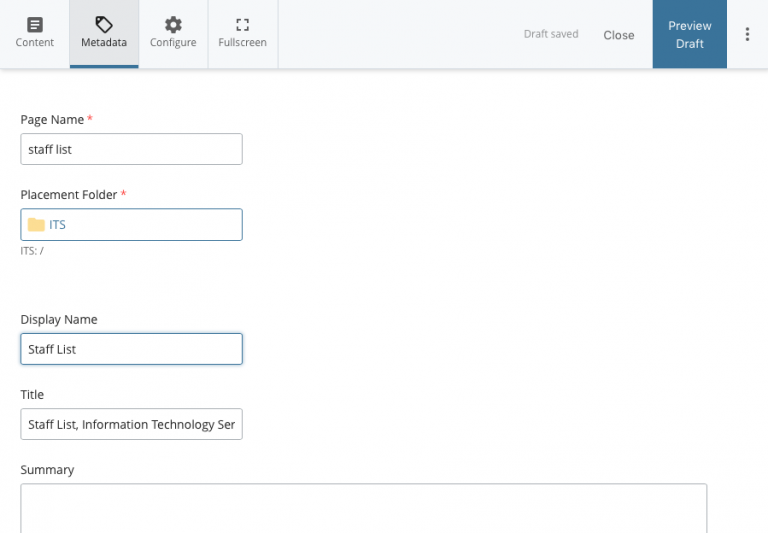
- The Page Name is the defining part of the url
- use all small letters
- don’t have any spaces
- you can use underscore (_) or dash (-)
- In this example the name of the page is “stafflist”
- In this example the URL will be :
http://www.wesleyan.edu/its/stafflist.html
- Editing Metadata:
There are two main fields in the metadata that you should edit- Display name: what shows up in the navigation bar, if indexed
- in this example we put Staff List — that will show up in the navigation
- Title: browser tab name, default book mark name, very good for searchability
- in this example we put Staff List (the Information Technology Service was already there — you should leave your department name in the title field)
- in this example we put Staff List (the Information Technology Service was already there — you should leave your department name in the title field)
- Display name: what shows up in the navigation bar, if indexed
- go back to the Content tab
- add your content to the Component section
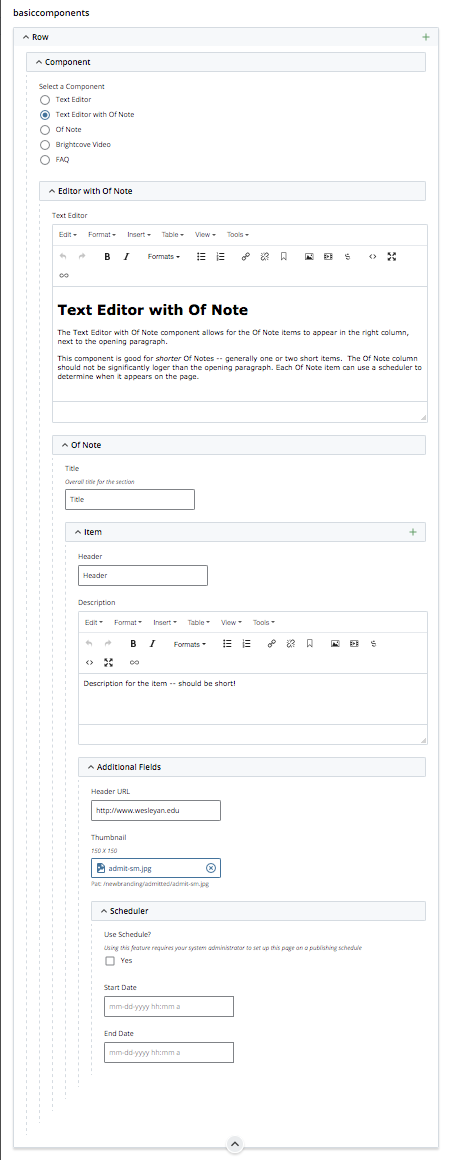
- Select the Text Editor with Of Note radio button
- Text Editor Box
- Put a Title on the page using Header 1 formatting
- include an introductory paragraph
- give the Of Note section a Title (optional)
- Each Of Note Item has optional fields:
- Header
- Description
- Header URL
- Thumbnail
- Scheduler Parameters
- use the green plus sign in the Item section to add new Items
- use the up and down arrows to re-order Items
- Text Editor Box
- Select the Text Editor with Of Note radio button
- when your edits are done
- Press the Preview Draft button
- if the draft looks good in Cascade
- press the Submit button to save your changes to the database.